
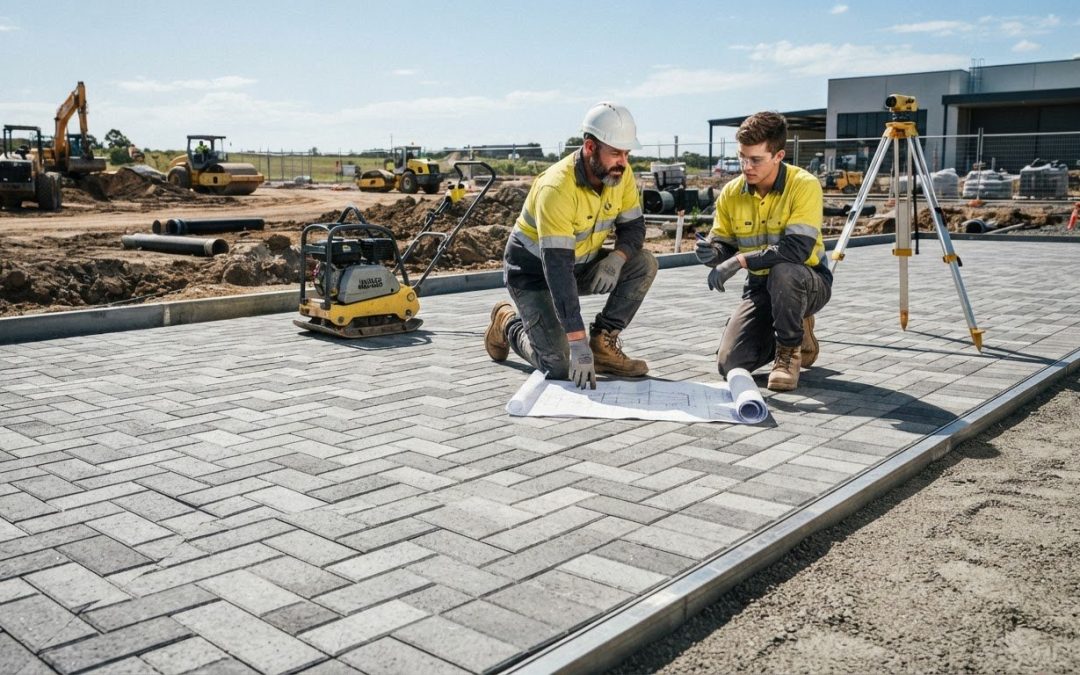
Could the success of a Geolink paving project be decided before the first paver is laid? Often, the critical work starts with understanding the site, drainage needs and project requirements, not choosing a laying pattern. This Geolink paving installation guide sets out a practical path from planning to handover, including what to review before work begins and which decisions must follow the approved project documents.
A reliable surface depends on decisions made well before installation. Ground conditions, access, drainage and the project specification all shape how the work should be planned. Clarifying these details early helps keep the paving aligned with the wider commercial or civil project and reduces the risk of carrying unresolved site issues into construction.
Below, we cover the key stages: assessing the site, reviewing project requirements, coordinating preparation and materials, carrying out the installation, and checking the finished work at handover. We also explain how Geolink paving can fit within a broader civil scope, supported by McMahons Civil’s earthworks, concrete and paving capabilities. Use the guide to identify the information your team needs at each stage.
Key Takeaways
- Use the Geolink paving installation guide to follow the project from site assessment through installation and handover.
- Record ground conditions, levels, access and drainage intent early to clarify preparation requirements.
- Use project drawings and specifications to determine materials and technical controls, rather than assuming conventional paver guidance applies.
- Coordinate set-out, preparation, placement and completion checks, using approved project documents to guide installation details.
- Bring paving, earthworks and broader civil requirements together in a delivery approach suited to the project scope.
What a Geolink paving installation involves on a civil project
A Geolink paving installation involves more than placing pavers across a prepared area. On a civil project, the scope depends on the surface’s intended use, the design documents and the conditions on site. Together, these establish how the work connects with surrounding levels, access routes and drainage requirements, and which construction controls apply.
System-specific installation follows the documented requirements for the selected Geolink system. Generic paver guidance describes only a broad construction sequence. The distinction matters because the finished surface depends on the complete specified build-up, not just the visible pavers. Where permeable performance is part of the design intent, install the full system in accordance with the relevant project and supplier documentation.
A practical Geolink paving installation guide separates the stages common to paving from the system details that must come from approved documents. This helps project teams coordinate the work without assuming that familiar methods or dimensions for conventional pavers automatically apply.
Where Geolink paving may fit within a project
Determine potential applications from the project design and documentation, rather than assuming them from the paving type. Intended use affects design decisions: a pedestrian area, vehicle route and service access area may have different requirements for loading, levels, interfaces and drainage. For example, specify a paved walkway beside a service area for the actual access use, rather than treating it as pedestrian-only because people also walk across it.
What an installation guide can and cannot standardise
A guide can set out a useful sequence: review documents, set out the work, prepare the site, place the paving and complete checks. It cannot replace the drawings, project specifications or supplier documentation that define the selected system’s technical requirements. Take base and bedding details, joint treatment, edge restraints and compaction methods from those documents. Don’t carry them over from conventional paving practice without verification.
Before organising the installation scope, make sure the project team understands what the paved area must do and how it meets adjoining civil works. Drawings establish the intended layout and levels, while specifications describe the required materials and quality controls. Site constraints, including access and existing ground conditions, can also affect how the work is planned and coordinated.
This review helps identify interfaces and responsibilities early. For instance, paving that meets a concrete threshold needs coordinated levels at the boundary. A drainage requirement needs to be reflected in the documented design and construction details. These are project considerations, not assumptions about a standard Geolink configuration.
- Intended use: identify pedestrian, vehicle and service access needs shown in the project requirements.
- Design intent: check layout, levels, drainage provisions and interfaces against the drawings.
- System controls: use approved specifications and supplier documentation for Geolink-specific installation details.
Grounding these decisions in project documents gives the installation team a clear basis for planning. It also helps prevent a general paving method from being mistaken for a system requirement, supporting a consistent handover against the project’s stated scope.
How site conditions shape Geolink paving design and preparation
A sound preparation plan starts with the actual site, not a standard paving detail. Apply this Geolink paving installation guide alongside the project drawings and specifications, which set out the design intent and controls for the selected system. Ground conditions, finished levels, access, drainage intent and intended use all influence how the work is staged and what needs resolving before construction begins.
Record existing levels, boundaries, service constraints and interfaces with adjacent surfaces. Note soft or unstable areas and signs of water-management issues so they can be reviewed against the design. This information helps the project team identify where site conditions may affect the documented approach. Underlying ground materials can influence pavement design and preparation, so consider observed conditions alongside the project’s geotechnical information and specifications.
Assessing the site before work begins
Walk the work area against the drawings and record differences in levels, boundaries or access. Check how materials and equipment can reach the work face, and whether staging or restricted access affects handling and sequence. A soft patch, unexpected low point or service constraint can change preparation planning. Document it for project review rather than allowing the crew to make an undocumented adjustment.
Confirming the specified pavement build-up
Trace each layer, transition and edge detail to the approved design and system documentation. Where the design includes geotextile, subgrade treatment or stormwater provisions, follow the stated requirements rather than assuming they apply to every installation. If layer depths, materials or compaction criteria are unclear, flag them for technical resolution before work proceeds. Permeability objectives depend on the specified pavement assembly, not the surface alone.
Use the approved documents and measured work area to establish material quantities and installation details. Compare site measurements with the design layout, then identify discrepancies that could affect quantities, levels or interfaces. Keep the design intent in view: a pedestrian path, vehicle area and service access zone may have different project requirements, even where the paved surface appears continuous.
Before installation, resolve ground conditions, levels, boundaries, services, access and staging, intended use, drainage intent, pavement build-up, edge details and open specification items.
- Ground and levels: note soft spots, existing grades and connections to adjoining surfaces.
- Access and staging: plan how materials and equipment will reach each work area.
- Design controls: confirm specified layers, materials, stormwater provisions and quality criteria in project documents.
This assessment gives the preparation crew a documented basis for coordinating paving with related civil works. McMahons Civil delivers Geolink paving and civil works within broader project scopes, with preparation informed by site conditions and approved requirements.
Geolink paving or conventional pavers: compare the installation requirements
Conventional paving guidance can explain general project stages, but it is not automatically a specification for Geolink. A method that suits one paving product or site may not match another system’s design intent, construction details or quality controls. Read the Geolink paving installation guide alongside the approved project documents and applicable system documentation.
Compare the requirements, not just the visible surface. The table highlights areas where planning and verification may differ. Documents for the specific project determine the actual installation method.
| Project consideration | Conventional pavers | Geolink paving |
|---|---|---|
| System documentation | Use the guidance relevant to the specified paver and project. | Follow the applicable Geolink system and project documentation. |
| Design intent | Confirm intended use, layout, levels and interfaces. | Confirm these requirements and any additional objectives stated in the design. |
| Installation sequence | Follow the documented method for the chosen paving product. | Use the sequence and controls specified for the selected system. |
| Quality checks | Check completed work against project requirements. | Check against the approved Geolink and project criteria, including specified details. |
Which installation details need system-specific verification?
Bedding, jointing, edge restraints and compaction all depend on the applicable specification. Some general paving advice gives joint-gap dimensions or a set number of compactor passes, but those figures cannot be assumed to apply to Geolink. Treat them as product-specific guidance, not universal rules. Confirm each technical detail against the approved Geolink documentation and project requirements before work begins.
This distinction prevents a familiar method from becoming an unapproved project assumption. If documents give different details or leave an installation control unclear, resolve the discrepancy through the project’s technical process before that work proceeds. This keeps the construction team working to a common, documented standard.
How project use changes the comparison
A pedestrian area and a vehicle-access area have different intended uses, so consider their design requirements separately. The comparison should also account for drainage intent, pavement interfaces and expected maintenance. These factors do not establish load capacity or drainage performance by themselves. The approved design and relevant system documentation determine whether the specified solution meets project requirements.
For instance, a pedestrian route that connects to a vehicle-access zone may need coordinated transitions and clearly defined requirements at the interface. Applying one generic detail across both areas could overlook differences in use or drainage intent. Record the requirements for each zone, then align the installation sequence and quality checks with the approved documents.
The practical rule is simple: use conventional paver guidance to understand broad paving principles, not to fill gaps in Geolink specifications. Start the comparison with the project’s intended use, then check the proposed work against the requirements that were approved.
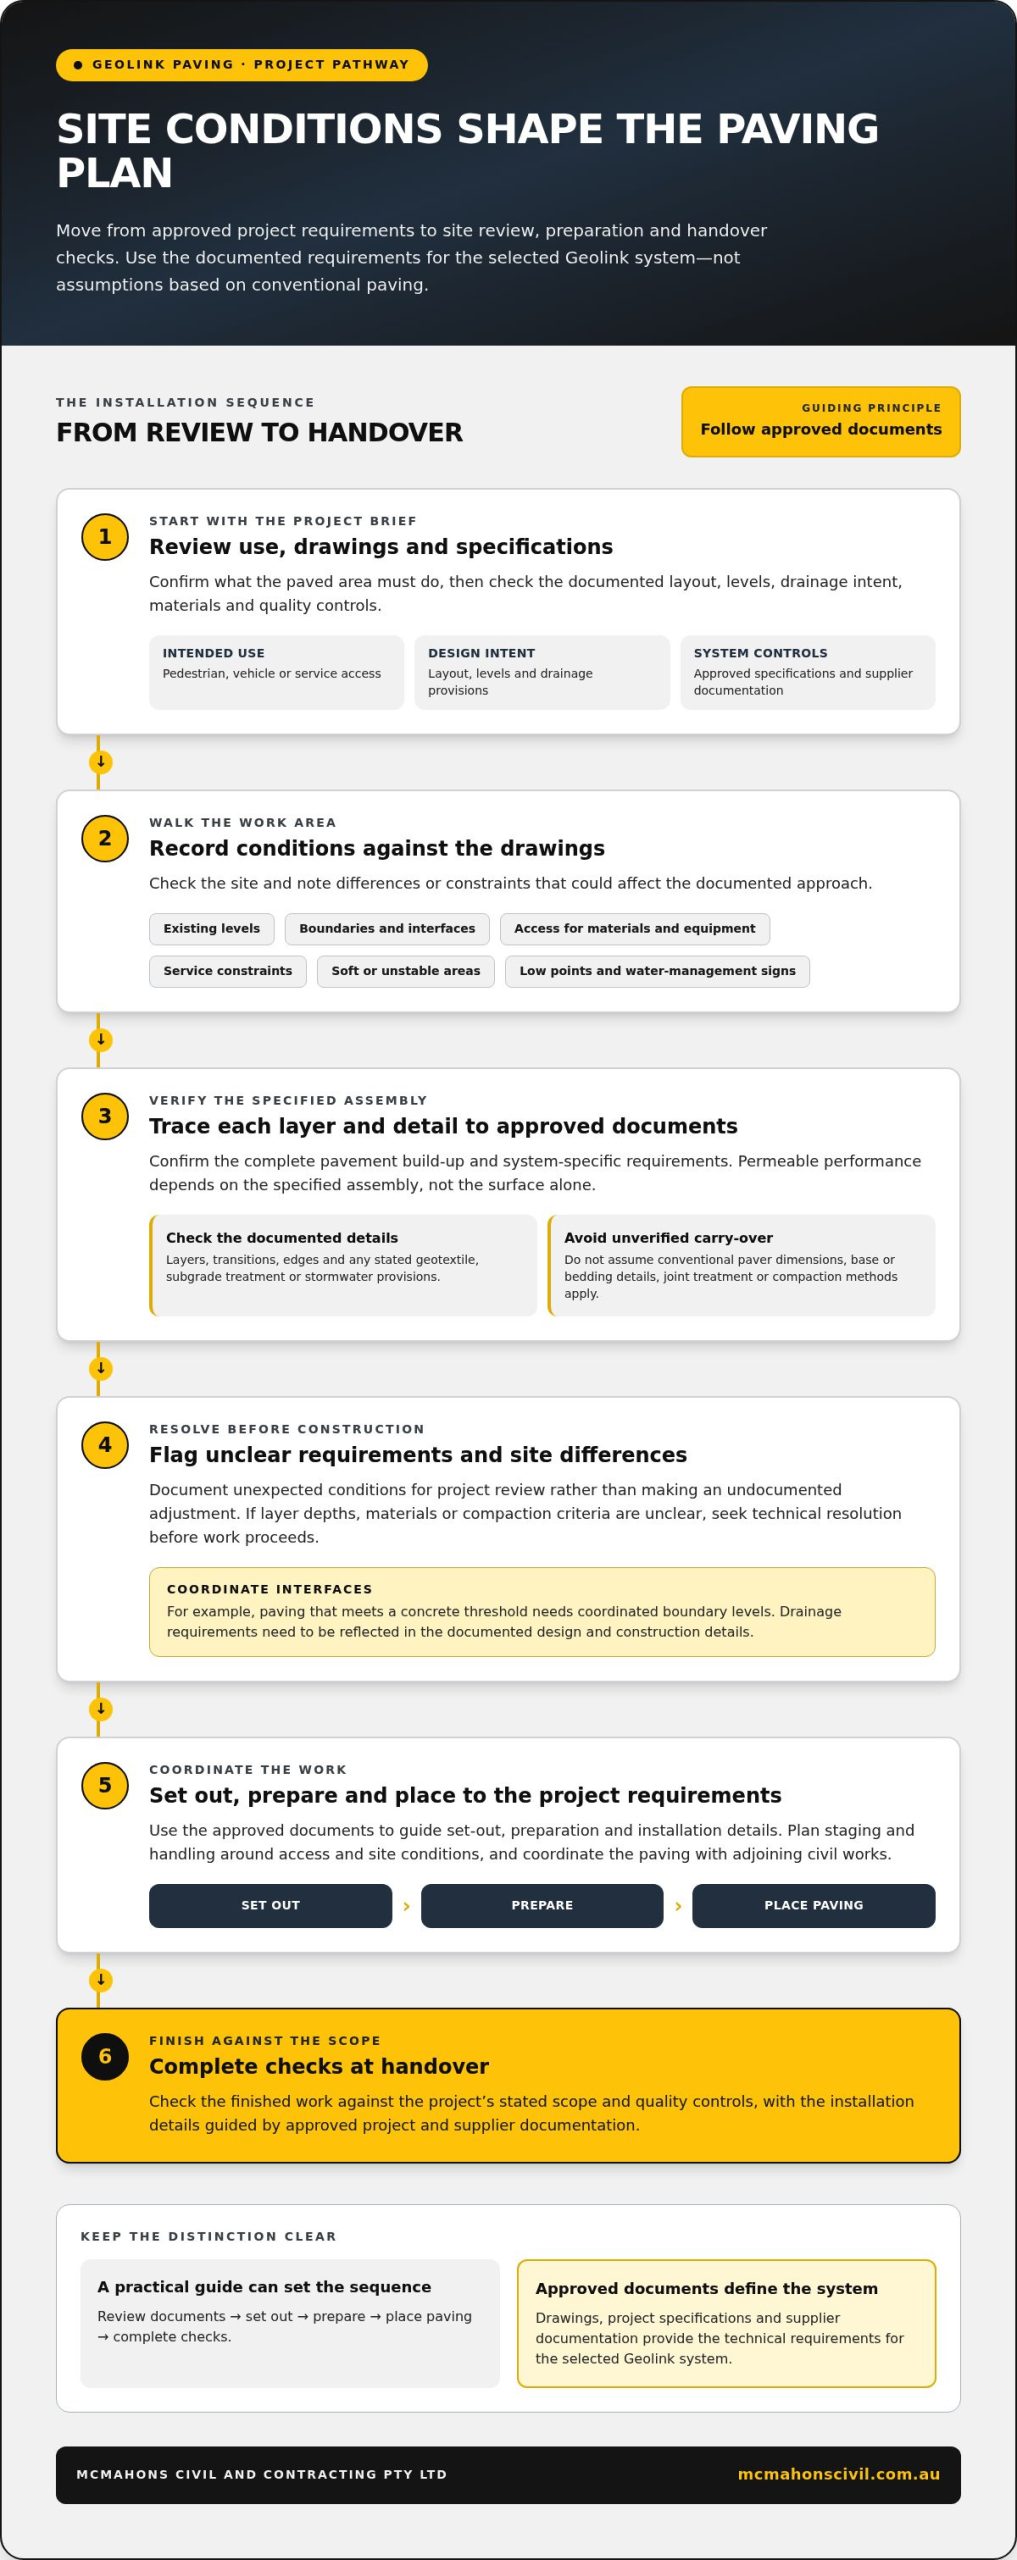
Geolink paving installation sequence: from set-out to quality checks
A reliable installation follows the project documents in a controlled sequence, with review points before work moves on or completed layers are covered. This Geolink paving installation guide provides a practical framework, while the approved drawings, specifications and applicable system documentation determine the technical controls. The result is a shared understanding of what must be built, checked and recorded, without treating general paving practices as Geolink requirements.
Coordinating set-out, preparation and placement
Before work starts, coordinate the drawings, materials, equipment and site access so the work area can be prepared and supplied in order. Confirm set-out, boundaries and finished levels against the design. Where paving meets another surface, review the interface before placement begins. If site conditions differ from the documents, pause work in that area for project review rather than making an undocumented change.
After set-out is reviewed, prepare the area and place the specified layers in the order required by the approved documents. Check each relevant stage against its stated requirements before covering it with subsequent work. This provides a practical review point for levels, interfaces and workmanship while they remain visible. Coordinate materials and equipment with the sequence to avoid disrupting completed preparation.
Placement, edge restraints and joint treatment should follow the applicable Geolink and project requirements. The documents also determine whether compaction or other controls apply and how to carry them out. Don’t rely on a standard paver sequence to supply missing values. If a required detail is unclear, resolve it through the project’s technical process before proceeding.
Checking the completed surface and documenting handover
At completion, inspect the surface against the project’s acceptance requirements. Review alignment, levels, edges, joints and transitions to adjoining works. Record any specified testing, approvals or corrective work. Handover should also include maintenance or system information where required by the project scope, giving the receiving team a clear record of the completed works.
Use this numbered sequence as a project framework, and take all technical criteria from approved documents:
- Set out the work and review locations, boundaries, levels and interfaces.
- Prepare the area and construct specified layers in the documented order.
- Review workmanship and relevant levels at required hold points before covering work.
- Place the paving, complete specified restraints and treat joints as documented.
- Inspect the finished surface, record required checks and complete handover information.
This sequence supports clear coordination from initial set-out to the final record, while keeping system-specific decisions grounded in the project and Geolink documentation. For a commercial or civil project, McMahons Civil delivers Geolink paving as part of a coordinated paving and civil scope.
Delivering Geolink paving with McMahons Civil
Geolink paving is often one part of a wider commercial or civil project, so successful delivery depends on more than the paving activity alone. McMahons Civil and Contracting delivers Geolink paving alongside civil works, earthworks, concrete and brick paving. When these activities sit within the same project scope, coordinating their sequence helps manage interfaces and keep work aligned with the approved documents.
Coordinating paving within a wider civil scope
Not every Geolink project requires separate earthworks or other civil activities. Where they are included, define their relationship to the paving at the outset. For example, preparation work may need to be completed before paving proceeds, while adjoining concrete works may require planned levels and transitions. Clear sequencing and communication help teams understand dependencies, access needs and when each area is ready for the next activity.
A methodical delivery approach also gives the team a shared basis for responding to site conditions. The project scope identifies the work to be completed, drawings and specifications set out the requirements, and site information helps the team plan activities around actual conditions. Keeping these inputs aligned supports coordination between paving and related work without assuming the same scope or sequence suits every site.
With more than 18 years of operating experience, McMahons Civil brings Geolink paving into broader civil project delivery. The approach is guided by the work required and the documents governing it, rather than generic assumptions about system details. For a wider view of how paving can fit into larger projects, the commercial paving services and solutions guide discusses paving in a large-scale civil context.
Moving from project requirements to delivery
Useful project inputs include the paved area’s intended use, current site information, design drawings and applicable specifications. Together, these clarify scope, interfaces and the details that guide preparation and installation. They also help establish how the work connects with surrounding activities, where review points are needed, and what information to record for completion and handover.
McMahons Civil’s civil and paving capabilities support a coordinated approach when a project brings these scopes together. As a Geolink paving contractor, the company plans delivery around project requirements and site conditions, using relevant documents to guide technical decisions. This keeps the work grounded in the approved scope while allowing the installation sequence to suit the project.
For a commercial or civil Geolink paving project, include the intended use, drawings and site conditions in your project brief to McMahons Civil.
Turn your project brief into a clear next step
Bring the project’s intent into a practical delivery conversation. A concise brief that identifies the site, intended use, current drawings and key project requirements gives the discussion a useful starting point. From there, the scope can be considered in context, including how Geolink paving fits with adjoining works and the wider programme.
This Geolink paving installation guide is designed to help you approach that discussion with clear priorities and a better sense of the decisions that shape delivery. McMahons Civil has more than 18 years of operating experience, with Geolink paving supported by broader capabilities in earthworks, concrete works and brick paving.
Share your project scope, intended use and site requirements with McMahons Civil to discuss your Geolink paving project.
Frequently Asked Questions
What is Geolink paving used for?
Geolink paving is used for paved areas where the project design specifies this system. The intended area might serve people on foot, vehicles or service access, but establish the use from the project requirements rather than assuming it from the paving type. For example, a shared access area should account for its different users and adjoining surfaces when setting the design and installation scope.
Can Geolink paving be used for vehicle traffic?
It may be specified for vehicle areas, but suitability depends on the approved design and documentation for the project. Vehicle type, frequency of access and site ground conditions are relevant inputs for pavement design. Don’t infer load capacity from appearance or assume a detail intended for a pedestrian path applies to a driveway or service route. The project documents should establish the intended use and acceptance criteria.
How is Geolink paving installed?
Plan installation around the approved project and system documentation, rather than a universal set of laying instructions. In broad terms, set out the work, prepare the area, install the specified pavement layers and paving, then check the completed surface. Use this Geolink paving installation guide as a planning aid. Materials, joint treatment and compaction must follow the project requirements.
Does Geolink paving allow water to drain through it?
Geolink is described as a permeable paving system, but drainage performance depends on the specified pavement assembly and project design. The visible paving alone doesn’t establish how water will move through or around the finished area. For example, a project may need to account for where runoff is directed and how paved sections meet surrounding surfaces. Use the approved drainage design and system documentation to understand the intended outcome.
What needs to be prepared before Geolink paving is laid?
Before laying begins, the team needs the relevant drawings, specifications, site information and a clear understanding of the area’s intended use. Identify access limitations, adjoining surfaces and known service constraints that could affect the work. If site conditions differ from the design, record the difference for project review. This helps prevent unresolved issues from carrying into construction.
Can general paver installation instructions be used for Geolink?
General paving instructions can explain broad stages, but they shouldn’t be treated as Geolink system requirements. Bedding, jointing, edge restraint and compaction details can vary according to the selected system and project specification. For example, don’t automatically apply a joint-gap figure from a general guide. Use the approved documentation to determine the relevant method and technical criteria for the work.
What should be checked after Geolink paving installation?
Check the completed area against the project’s acceptance requirements, including the visible finish and its connections to adjoining works. Depending on the specification, review alignment, surface levels, edges and joints, and record required testing or approvals. Note any corrective work and confirm that required handover information, such as maintenance guidance, is provided to the receiving team as part of the project scope.